


A concise guide to building an AI chatbot using Google’s Gemini API in Next.js.
Contents
Prerequisites
- Node.js 18+
- Next.js project (App Router)
- Google AI Studio account for API key
Step 1: Install Dependencies
npm install @google/generative-ai
Step 2: Get Your Gemini API Key
- Visit Google AI Studio
- Create a new API key
- Add it to .env.local:
GEMINI_API_KEY=your_api_key_here
Step 3: Create the API Route
import { GoogleGenerativeAI } from "@google/generative-ai";
import { NextResponse } from "next/server";
// Initialize Gemini model with API key from environment variables
const genAI = new GoogleGenerativeAI(process.env.GEMINI_API_KEY || "");
const model = genAI.getGenerativeModel({ model: "gemini-2.5-flash" });
export async function POST(req: Request) {
try {
const { message } = await req.json();
const prompt = `
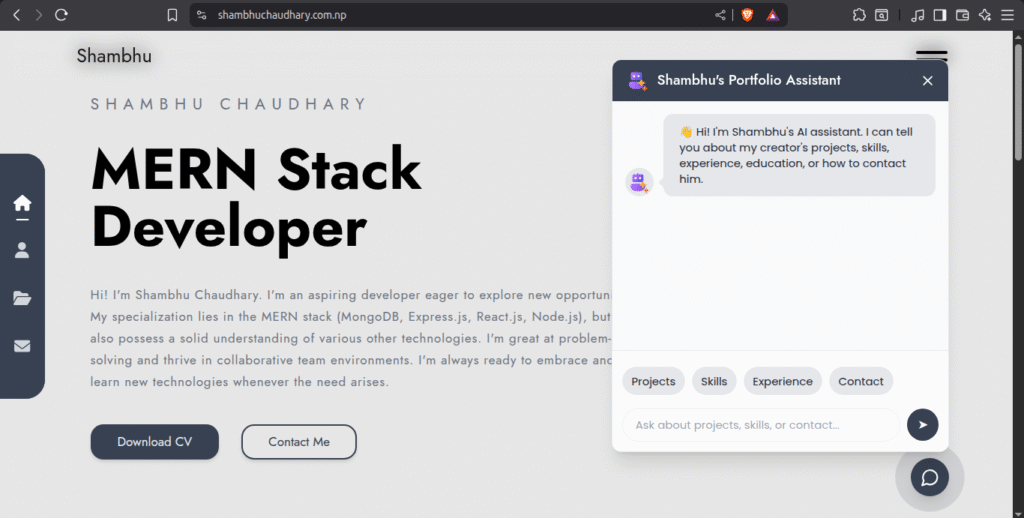
You are Portfolio Bot, the AI assistant for [Developer Name], a Frontend Developer and Software Engineer.
Your job is to provide accurate, concise, and professional answers about the developer’s skills, projects, experiences, education, and professional background based solely on the provided portfolio data.
---
### Portfolio Information
[Insert portfolio data here: skills, experience, projects, education, etc.]
---
### Instructions for Responding
- Answer only using the information provided above.
- Keep responses short, clear, and professional.
- Use bullet points for lists where appropriate.
- If asked about something not included, politely say you don’t have that information.
**User Input:** ${message}
**Response:**
`;
const result = await model.generateContent(prompt);
const responseText = result.response.text();
return NextResponse.json({ response: responseText });
} catch (error) {
console.error("Error generating response:", error);
return NextResponse.json(
{ error: "Error processing request" },
{ status: 500 }
);
}
}
Step 4: Build the Chatbot Component
"use client";

import { useState, useRef, useEffect } from "react";
import { MessageCircle, X } from "lucide-react";

export default function ChatbotToggle() {
const [isOpen, setIsOpen] = useState(false);
const [messages, setMessages] = useState([
{ sender: "bot", text: "👋 Hi! How can I help you?" },
]);
const [input, setInput] = useState("");
const [loading, setLoading] = useState(false);
const chatRef = useRef<HTMLDivElement>(null);

const sendMessage = async () => {
if (!input.trim()) return;

const userText = input;
setInput("");
setMessages((m) => [...m, { sender: "user", text: userText }]);
setLoading(true);

try {
const res = await fetch("/api/chat", {
method: "POST",
headers: { "Content-Type": "application/json" },
body: JSON.stringify({ message: userText }),
});
const data = await res.json();
setMessages((m) => [...m, { sender: "bot", text: data.response }]);
} catch {
setMessages((m) => [
...m,
{ sender: "bot", text: "⚠️ Something went wrong. Please try again." },
]);
} finally {
setLoading(false);
}
};

useEffect(() => {
chatRef.current?.scrollTo(0, chatRef.current.scrollHeight);
}, [messages, loading]);

return (
<div className="fixed bottom-12 right-6 z-50">
<button
onClick={() => setIsOpen(!isOpen)}
className="bg-gray-700 text-white rounded-full p-3 shadow-lg hover:scale-105 transition"
>
{isOpen ? <X className="w-6 h-6" /> : <MessageCircle className="w-6 h-6" />}
</button>

{isOpen && (
<div className="fixed bottom-20 right-0 w-80 h-96 bg-white border rounded-xl shadow-xl flex flex-col">
<div className="bg-gray-700 text-white px-4 py-3 text-sm font-medium">
Chat Assistant
</div>

<div
ref={chatRef}
className="flex-1 p-3 overflow-y-auto bg-gray-50 space-y-2 text-sm"
>
{messages.map((m, i) => (
<div
key={i}
className={`flex ${
m.sender === "bot" ? "justify-start" : "justify-end"
}`}
>
<div
className={`px-3 py-2 rounded-lg max-w-[75%] ${
m.sender === "bot"
? "bg-gray-200 text-gray-800"
: "bg-gray-700 text-white"
}`}
>
{m.text}
</div>
</div>
))}

{loading && (
<div className="flex gap-1 px-3 py-2 bg-gray-200 rounded-lg w-fit">
<span className="w-2 h-2 bg-gray-500 rounded-full animate-bounce" />
<span className="w-2 h-2 bg-gray-500 rounded-full animate-bounce delay-75" />
<span className="w-2 h-2 bg-gray-500 rounded-full animate-bounce delay-150" />
</div>
)}
</div>

<div className="p-3 border-t flex gap-2">
<input
value={input}
onChange={(e) => setInput(e.target.value)}
onKeyDown={(e) => e.key === "Enter" && sendMessage()}
className="flex-1 px-3 py-2 text-sm border rounded-full outline-none focus:ring-2 focus:ring-blue-500"
placeholder="Type your message..."
/>
<button
onClick={sendMessage}
className="px-4 py-2 bg-gray-700 text-white text-sm rounded-full hover:bg-blue-600"
>
Send
</button>
</div>
</div>
)}
</div>
);
}
Step 5: Add to Your Layout
import ChatbotToggle from "@/components/chatbot/ChatbotToggle";

export default function RootLayout({ children }: { children: React.ReactNode }) {
return (
<html lang="en">
<body>
{children}
<ChatbotToggle />
</body>
</html>
);
}
Customization Tips
- Customize the prompt in the API route with your knowledge base
- Switch models: use gemini-pro for more capable responses
- Add conversation history for context-aware responses
- Style the component to match your design
Best Practices
- Keep API keys in environment variables
- Add rate limiting for production
- Handle errors gracefully
- Monitor API usage to manage costs
