


Prerequisites
Contents
- Windows OS
- Enable virtualization in BIOS
- WSL 2 (Window Subsystem for Linux) enabled (recommended by Docker)
Important Note: If you have Docker installed in your system. Click this link to Learn Docker: https://bytespacenepal.com/docker-for-beginners-from-it-works-on-my-machine-to-it-works-everywhere/
Installation Checklist
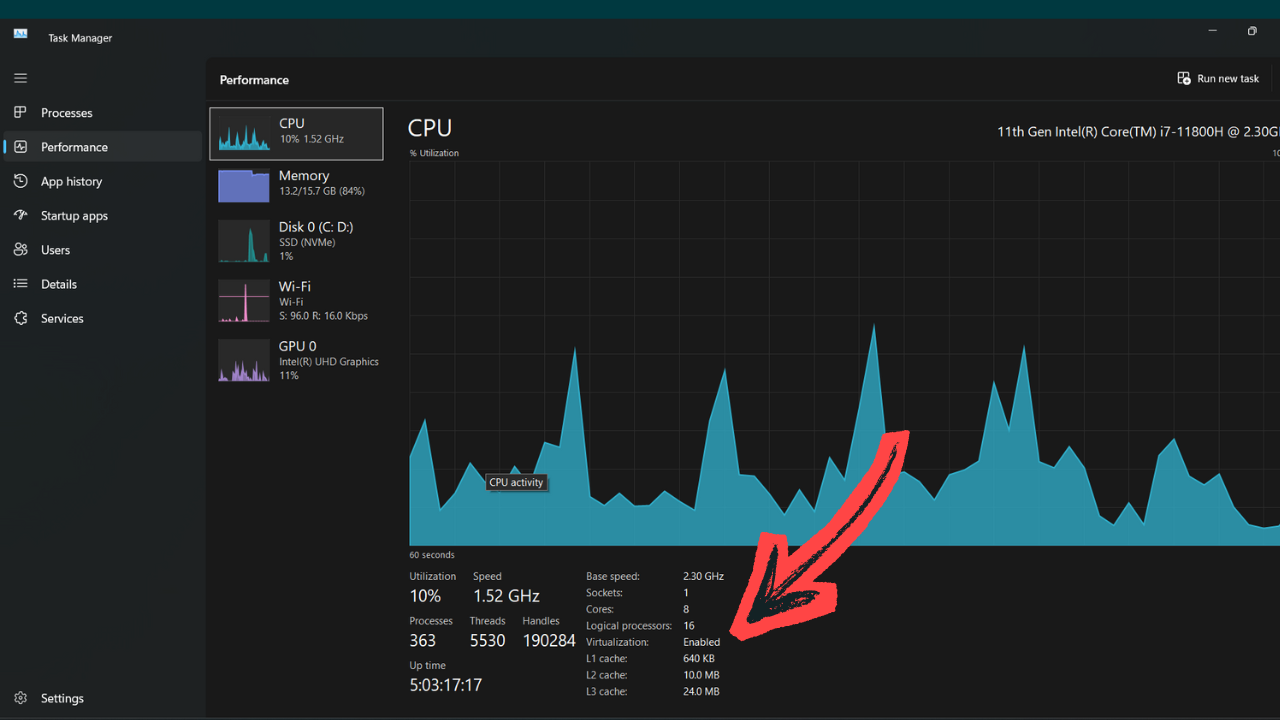
a. Check If Virtualisation is Enabled on BIOS or Not:
- Right-click on the Taskbar and select Task Manager(or press
Ctrl + Shift + Esc) - Go to the Performance tab
- Click on CPU on the left side
- Look at the bottom right for Virtualization: Enabled / Disabled
2. WSL2 Installation Status
If WSL 2 is not installed, then install it by following the steps
- Open PowerShell as Administrator:
wsl --install
This will install WSL with Ubuntu by default and set WSL 2 as the default version. A reboot may be required.
- Restart your computer if prompted.
Set WSL version to 2 (if needed)
wsl --set-default-version 2
Download Docker Desktop
To download Docker Desktop, go to the link and Download Docker Desktop based on your distribution.
- Run the installer.
- Follow the installation wizard (select ‘WSL 2 backend’ if you are on Windows Home).
- Restart if required.
Verify Installation
Open PowerShell or CMD and run the following command:
docker --version
The output looks like the following:
Docker version 28.1.1, build 4eba377
Here you go, You have successfully installed Docker in your system.
